Everything you should know about the distressed furniture look
Styles come and go, trends fade in and out over time. The distressed furniture look is a literal timeless classic in terms of furniture aesthetics. The distressed look has been around since wood furniture was a thing.
Naturally, this look can be achieved by having your wooden furniture for an extensive period of time. Or, if you don't have an eternity to wait, you can get this style by distressing your wood.
In this post, we'll go over what you can do to create the ageing wood look on to your furniture.


Image credits: pixabay.com
What is distressed furniture?
Distressed furniture offers up a sense of lived-in atmosphere, giving your living space a homely feeling.
The distressed furniture look comes in many different names and a number of techniques. Distressed furniture or, distressing is a decorative act of giving wooden furniture an old, weathered look. It's a distinctive, yet familiar style of a wood finishing where it can be achieved by using simple tools.
Distressing can be a fun project if you're looking to decorate your interior and save money. You can save a fortune by utilizing this refinishing method instead of buying expensive antique furniture. However, distressed looking furniture produces age where it visually connects to genuinely old antiques.
In modern times, distressing has seen a popularity spike in the furniture DIY world. This style of furniture can be seen with wears, gouges, cuts, slices, scratches and other deliberate methods of ageing wood.
Let's take a deeper look into what really is distressed furniture;
What style is distressed furniture?
This style is usually referred to as shabby chic furniture. For furniture buffs seeking the distressed furniture look, they will often go for strong signs of wear in either new or old pieces. Shabby chic is heavily painted where gnarled chips and flakes to the edges are made to achieve this style.
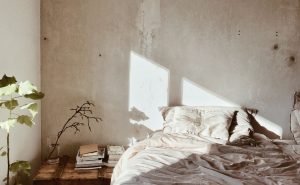
Image credits: unsplash.com
Using multiple layers of paint over time with complementing colours can help bring out the shabby chic look. This also includes the use of glaze, wax, coats and experimenting with other finishings. Choosing colours can be a task depending on your setting. Popular safe choices for paint are light blues, soft pinks, general neutrals and of course, the classic white colouring. The choice of paint is up to you, try out other colours to find out what's best suited to your surroundings.
Shabby chic is not just limited to the inside of the home but can also be impactful outdoors. We like to see old distressed wooden tables out in the garden as a part of a set. Or a chest of drawers being the central point, surrounded by botanical life that would make for a beautiful photo.
What is the difference between vintage and shabby chic?
Vintage and shabby chic tends to be synonymous terms used to describe a style of furniture. From a first glance, putting these two styles side by side, you may think what's the difference? Although they look fairly similar, the methods used to accomplish their aged look is very different.
Vintage

Image credits: unsplash.com
Anything vintage is something that's in a place in time, between the now, modern time and antiques. So what is considered vintage? Vintage is associated with an item that has existed for over twenty to fifty years. Typically anything considered to be out of date is known as vintage. Something you can bring back into style would fall under this term as well.
Shabby chic

Image credits: unsplash.com
Shabby chic is one of those sub-styles where the worn appearance is made deliberately. Shabby chic can fall under clothing, furnishings or anything that can be converted into the distressed look. This can include taking various tools then applying tears, scrapes, dents, scratches or whatever you need to make your item looked aged.
TLDR;
Vintage is naturally made.
Shabby chic is deliberate.
As we covered the "what", let's go on to do the "how". We'll discuss here how we can create the distressed furniture look.
How to get distressed furniture look?
Looking to save money?
Already have wooden furniture at home?
Interested in a hands-on approach?
Upholsters, antique specialists, DIY enthusiasts, and generally curious people can rejoice because we'll go over how we can distress your furnishings. Here you will find out the not so secretive, simple but actionable methods to achieving this timeless style.
What you will need

Image credits: unsplash.com
Here is a list of tools and materials needed for distressing. There is no particular order because each item will be used for different methods. There's a good chance you will already have some of these in your home. If not, most of these are very cheap and easy to obtain. Make note that every single item listed is not needed and every item below can be mixed or applied differently.
Say goodbye to hunting for expensive antiques;
Paint – It's recommended to get two or more colours for your project.
Paintbrushes – Using multiple paintbrushes is recommended for using different colours. While one brush is drying after being cleaned, you can use a fresh brush to add the other coat of paint once the paint dries.
Paint remover or stripper – Use this to remove or wipe away some existing paint. This is for unwanted damage.
Sandpaper – Another way to remove paint or finish. Can also b used as a base for the finish.
Nails, metal sheets, hammers and chains – These can all be used to make deliberate but convincing, irregular surface damage.
Finishing coats or stains – There are many kinds of finishing stains and coats. You can go chemical or natural when choosing a finish.
Steel wool – this has multiple uses, from removing a finish, contributing to a finish or just causing some damage to the wood.
Cloths – Also have multiple uses such as adding paint, coats, removers, stain effects and wiping down surfaces.
Sanding methods
Sanding is an interesting way to get a good weathered look going. Not a lot of extra tools or chemicals are needed to distress with sanding.

Image credits: unsplash.com
Sandpaper
Probably the easiest method to get the distressed furniture look. For the bare-bone minimum in distressing, you can pick up some sandpaper from your local hardware shop.
Using sandpaper requires some elbow grease and a good amount of time. With this simple method, you are able to achieve a more subtle look. When using sandpaper only, it's recommended to distress small furnishing. Let's go for a small bedside table;
Take your sandpaper
Start slowly on the areas you want to be weathered
Over time apply less pressure outward from the point of where you are sanding
Once you have the desired effect, repeat process in other areas
Electric sander
A slightly pricier option, think of the above solution but done much quicker. You can really get some heavy-duty sanding done with this. This option is not only for creating the worn effect but contributes to the finishing process.
If you're looking to save time, this is the option for you. Larger pieces are better suited for this method but anything with a wooden surface would do. A 240 grit is recommended to start out with. You can move up to more coarse grits one you get a feel for your sander.
Layered paint method
The layered paint method is a fun, colourful way to distress your furniture. You may already have a bunch of paint lying around at home to get yourself started. We'll look at adding multiple layers then distressing the piece to give it an interesting two-colour effect.

Image credits: pixabay.com
Neutral but colourful paints are recommended to first start out with. Nothing too mute or loud, but a nice in-between for your selection.
Cover your piece in the first layer then wait for it to dry. Let your paint completely dry out for 24 hours. Clean the paint from your brush and have a fresh one ready.
Once your first coat is dry, select a fresh brush and apply a second coat. Repeating the process in the first step.
(optional) If you want a third coat, repeat the steps above.
When your final coat is completely dry, grab a sheet of sandpaper or an electric sander. Depending on the size, how many layers applied and what look you are going for, be mindful of how much you distress. Sand down until all two colours ( or three ) colours come in to view.
Finally, you have the option to use a finish for preservation or stains. For a better more worn look, you can skip the finisher and let your wood further age naturally.
Damage method
When you think the distressed furniture look, usually worn, tear and damage is most likely to come to mind. Or maybe, aggressively sanding down a wooden wardrobe. Over time furniture is going to get damaged, could be during a big move or a household accident. When we distress our furniture, the least popular option is causing serious damage to your furniture.

Image credits: pixabay.com
Here are some quick tips you can use when you are in the process of distressing your furnishings;
A bag of nails or the thin end of a hammer can make for some interesting effects. Try getting the bag of nails and wacking ( yes, wacking ) the wooden surface areas. You can use the thin end of a hammer to create gashes in a tables' legs. Depending on the durability of the wood, you may need to apply heavier hits.
For larger, less noticeable dents, try using a thick chain. This can create some uneven effects you often see in distressed furniture.
Small, sharp metal sheets are great for creating these small cuts and splits on wood products. These sheets are also great for shaving areas where you may want to go asymmetrical.
BE VERY CAREFUL when you are carrying out these tasks. Accidents can easily happen at any moment, so be sure you handle your tools and bee mindful with these damaging methods.
What's next?
Now you know what and how to get the distressed look for your home, what else is there left? Well, there are an endless amount of techniques, order, and methods you can do to get this look.
We like to see unconventional methods instead of what's already out there. So, feel free to experiment with your tools or your household items.
You may find the next big trend resulting in the distressed furniture look.
Everything you should know about the distressed furniture look was first published on https://www.adetailedpalette.com/
via A Detailed Palette - Feed https://www.adetailedpalette.com/everything-you-should-know-about-the-distressed-furniture-look/
